Content of this Document
The purpose of this document is to provide details on the cooling system in the slicer:
- Introduction and overview of the cooling system.
- Setting up parameters at the slicer back-end.
- Previewing and tuning parameters.
Introduction
Cooling is a main concern in different 3D Printing Processes. Typically for plastic materials, if you spend too much time on the same area or if you go too fast, you will not let enough time to cool the material and it will be a disaster.
The cooling system is based on a slow-down on the layer printing time, on managing one or several fans to actively cool the layer printed. What make the cooling system of ChopChop3D different is that it is asymmetric just like the asymmetry between the heat and the cool phase of the hot-end: this enables to smooth out speed transitions differently backwards and forwards among-st layers to reduce hot-spots and cold-spots respectively.
Setting up parameters at the slicer back-end
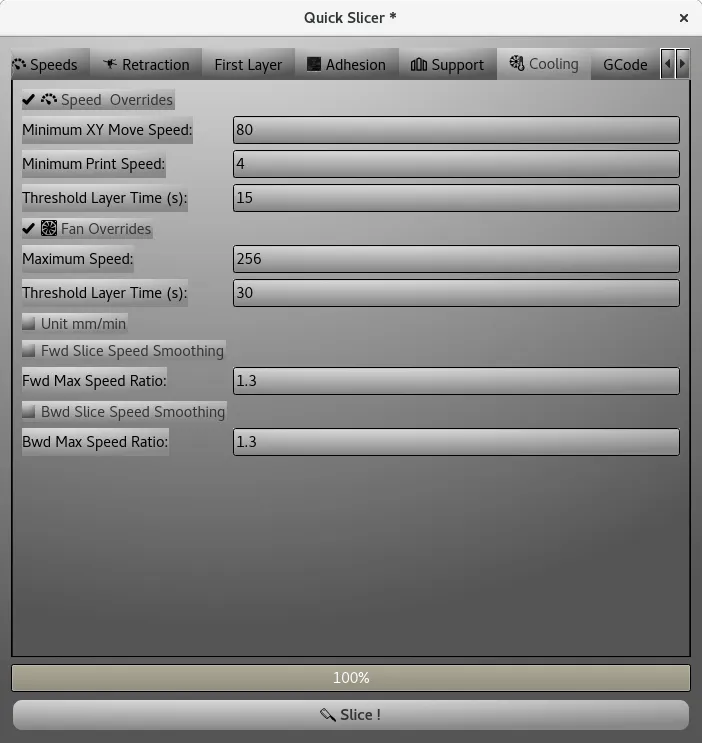
A Cooling Tab is found in both Quick Slicer and Slicer dialogs. This tab is decomposed as follows :- Speed Overrides : contains parameters to slow down to reach the given time threshold for each layer.
- Fan Overrides : contains parameters to manage the set of fans used for active cooling.
- Speed Smoothing : enables to generate smooth speed transitions between slices forwards and backwards.
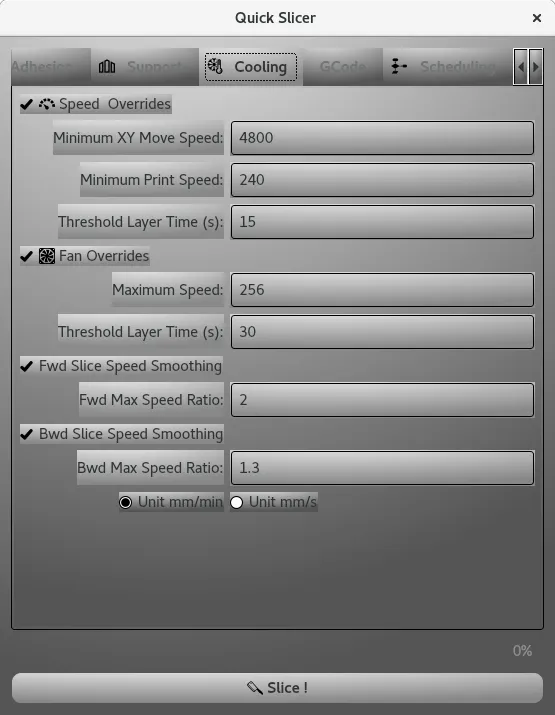
Speed Overrides
Those contains the main parameters to slow down each layer to try to reach the time threshold specified.
- Speed Overrides : when enabled the speed overrides is applied.
- Minimum XY Move Speed : is the minimum move speed after maximum slow down.
NB: In general, it should not be too slow otherwise it will generate more stringing during retractions, also print move dominates in general. - Minimum Print Speed : is the minimum speed for printing after maximum slow down.
- Threshold Layer Time : is the threshold time where the cooling algorithm starts to be applied and its target for the slow-down.
Notes:
- The slow-down is first applied on the print moves with a fixed amount, it means that the speed ratios in between different print phases are the same.
- The slow-down on non print moves are applied when no slow down is possible on print moves.
Fan Overrides
Those contains the main parameters to increase the fan speed accordingly to the the time threshold specified that can be different of the layer time threshold specified for moves.
- Fan Overrides : when enabled the speed overrides is applied (starting from the fan speed sets for the layer).
- Maximum Speed : is the maximum speed that fans can reach to cool the layer.
- Threshold Layer Time : is the threshold time where the fan overrides is enabled.
Speed Smoothing
Speed Smoothing aims at controlling and reducing speed differences in between layers to avoid to have :
- cold extrusions : when moving forward from a slow speed print layer to a fast speed print layer where the hot-end is unable to provide the required extrusion flow rate (for instance from a very slow first layer to a too aggressive next layer).
- hot-spots : when moving forward from a fast speed print layer to a slow speed print layer that contains small print area.
The following parameters are used to specify speed smoothing as follows:
- Fwd Slice Speed Smoothing : that enables the forward slice speed smoothing to prevent/reduce cold extrusions.
- Fwd Max Speed Ratio : this is maximum ratio between the speed of each print phase of the current layer and the print speed associated to such print phase in the next layer, that is reduced to this maximum ratio as required.
- Bwd Slice Speed Smoothing : that enables the backward slice speed smoothing to prevent/reduce hot-spots.
- Bwd Max Speed Ratio : this is the maximum ratio between the speed of each print phase of the next layer and the print speed associated to the same print phase in the current layer, that is reduces to this maximum ratio as required.
Notes: Speed ratios in between print phases inside the layer are preserved when any of such speed smoothing is performed: no change on extrusion flow is performed at this stage in between print phases inside the given layer.
Speed Unit is either mm/min or mm/s, you can switch quickly from one or another through the associated checkbox.
Previewing and tuning parameters
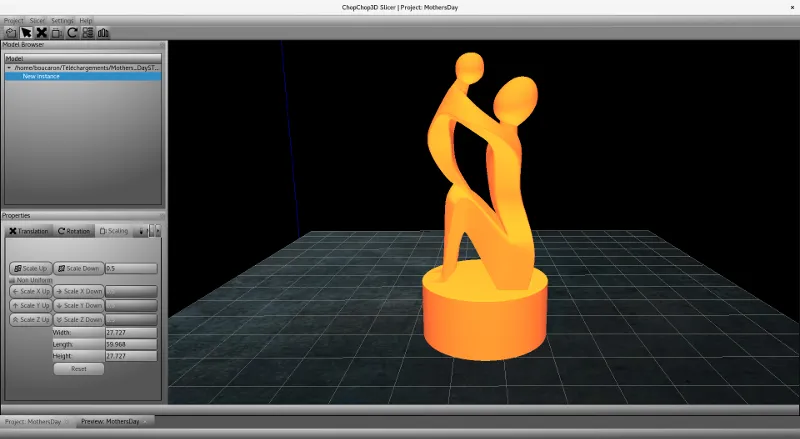
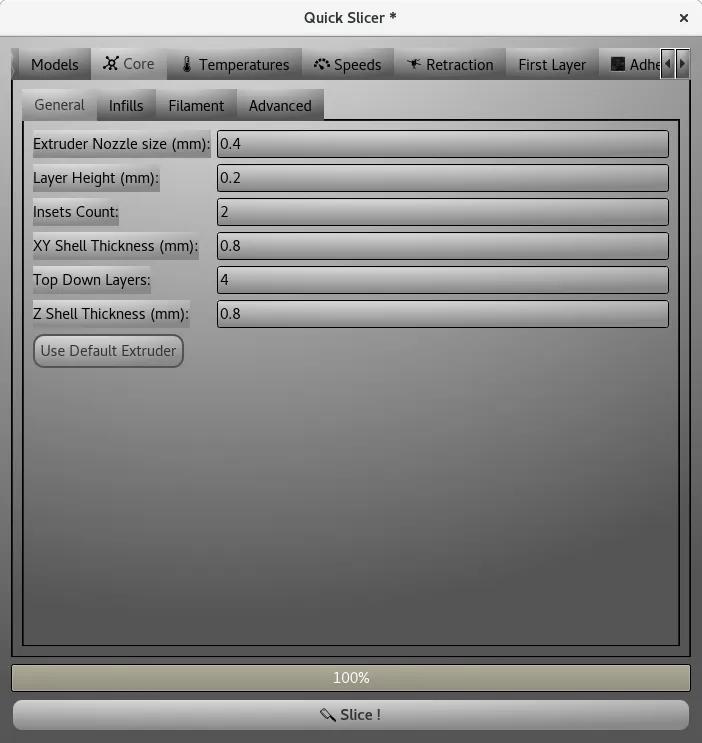
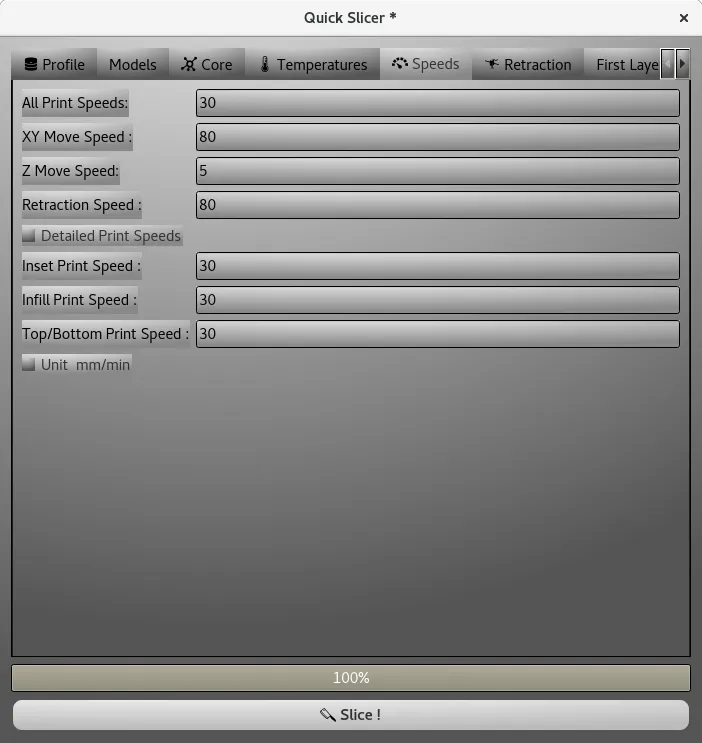
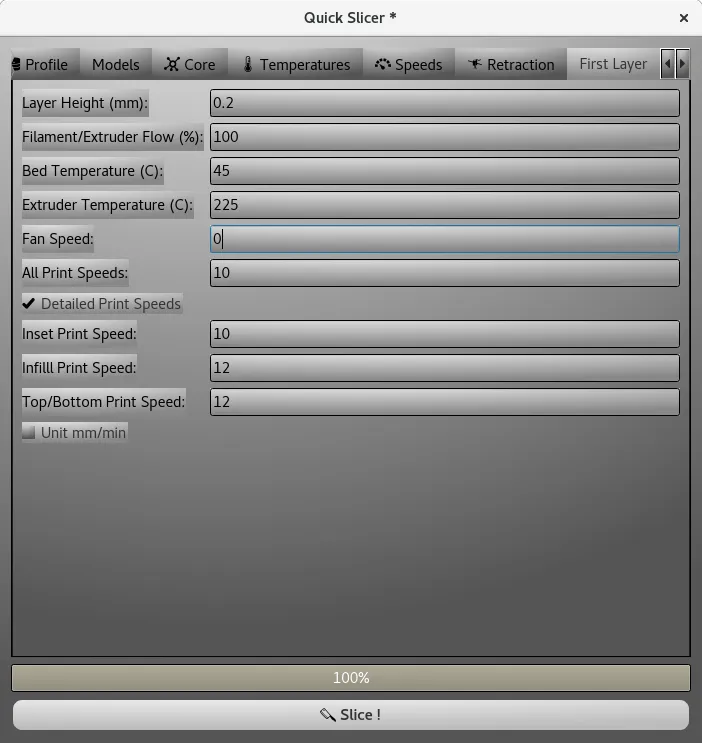
We will take as an example the following model "Mother's day" designed by Khaled Alkayed . We will scale down to 50% this model in order to exacerbate the need for cooling. We will use the following parameters as shown in the next screenshots (the infill is set to Linear and 15 percents):
First, we will enable only the cooling parameters to check what happens as follows :
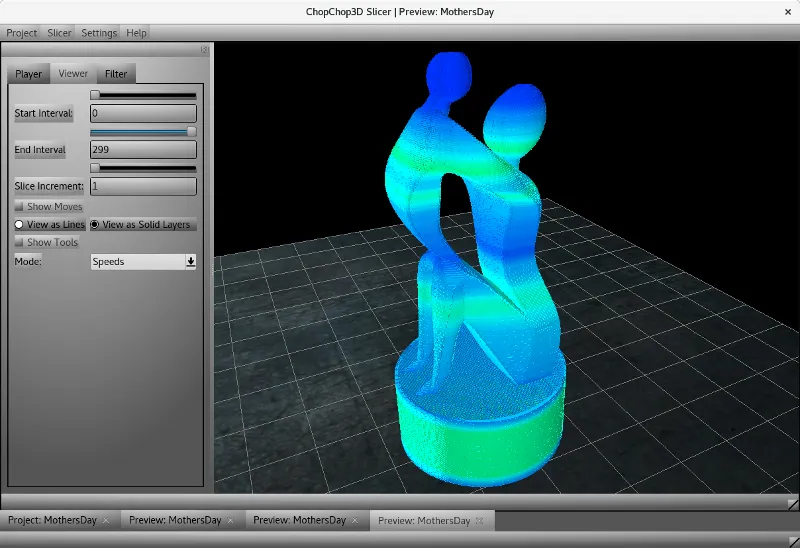
We open the print preview and in the tab Viewer we click on the mode and scroll down to Speeds to obtain the following:
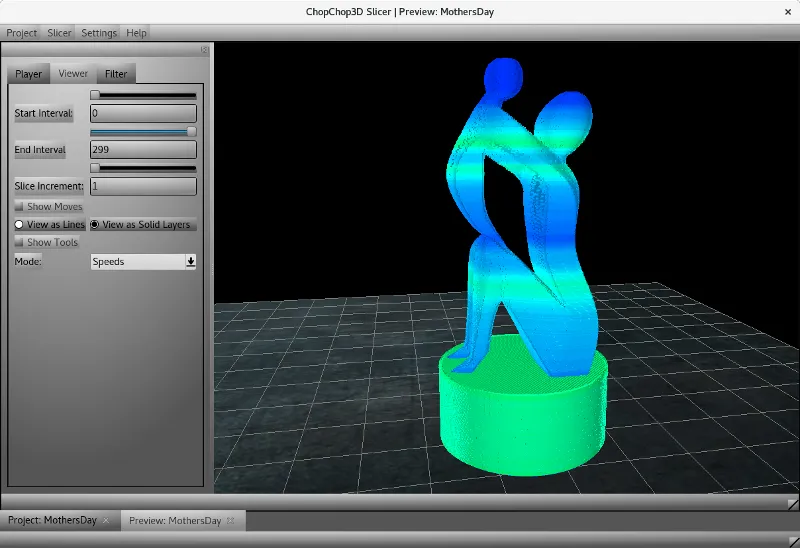
The coloring scheme is going from Blue for the slowest speed, passing through Green for medium speed and finally to Red for the fastest speed.
This model is pleasing because it generates nearly all the different kind of speed transitions you can find. You can see that both heads of the model are in blue denoting the slowest speed but also the transition between the pedestal and the statue and also at the feet of the baby. Also if you zoom at the start of the pedestal, you will notice the first layer that is blue and the next one in green that is a place where a cold extrusion can happen.
First let us enable the forward speed smoothing pass, we go back in the project tab and we update the cooling tab as follows then we re-slice (we keep the previous preview in order to compare graphically)

You can see that the start of the pedestal ramp up slowly from the slow speed of the first layer to the faster speed which is ok.
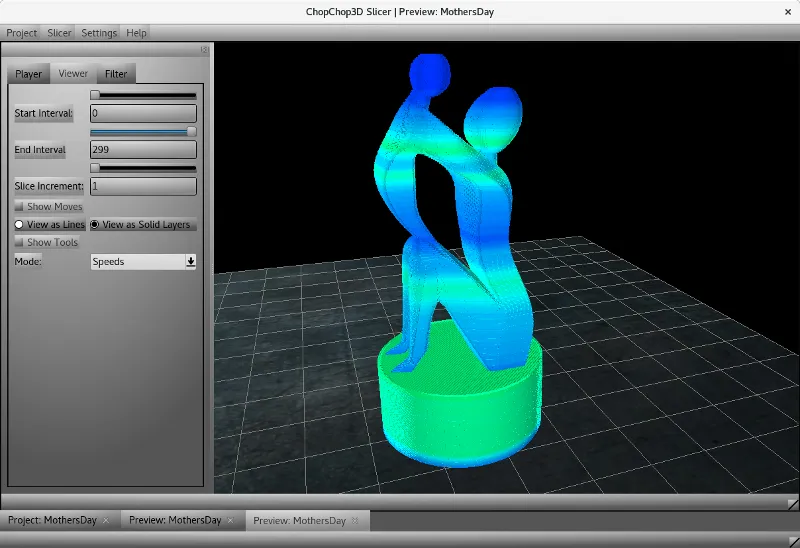
However we have a hot spot from the end of the pedestal to the feet of the mother of the statue: it is time to activate the backward speed smoothing pass, we go back to the project tab and update the cooling parameters as follows, then we re-slice (we keep all previous previews in order to compare graphically)

You can see now there is a smooth transition at the pedestal and also that slow speeds from the heads retro-propagated down in the model.
Notes: In this example, we set a very small ratio in order to highlight graphically the effect of smoothing parameters.
Of course such cooling can affects you print time, you can check in the Detailed Statistics