Content of this Document
The purpose of this document is to detail the Project features of the ChopChop3D Slicer:- Overview
- 3D View
- Import
- Model Browser
- Selection
- Translate
- Rotate
- Scale
- Mirror
- Gizmo
- Material
- Duplicate
- Group
- Align
- Show and Hide
- Supports
- Wipe Towers
- Open, Save, Import and Export
- Camera
- Presets
Overview
The Project is the place where you will manipulate your parts on the Bed. We will cover the different settings in this document. Before going in the detail, let us have an overview.
When you start ChopChop3D, it is empty. You need to open or to create a new Project.
Let assume we want to create a new one, you go in the menu and you click on Project/Next
You will obtain something similar has the following the screenshot
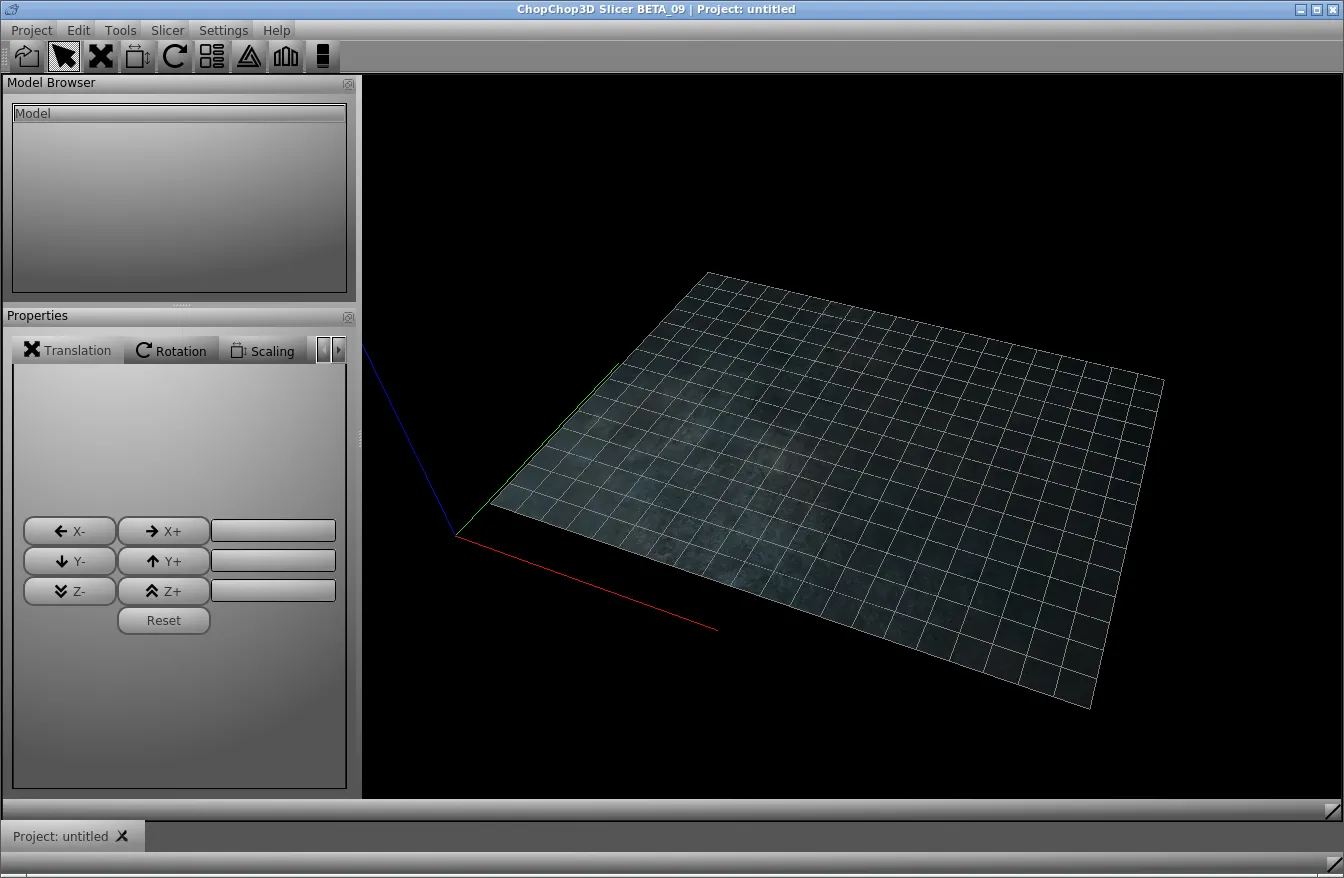
We have the following:
- 3D View : that is showing a virtual bed, with a grid and a XYZ Orientation where the Red line is X, the Green line is Y and the Blue line is Z.
- Menu : the menu contains a few entries: Project, Slicer, Settings and Help
- Tool Bar : that has a few items to Import models, Select, Translate, Scale, Rotate, Arrange, Supports and Wipe Towers.
- Model Browser : this is a panel that contains a tree of all groups and models.
- Properties : this is a panel that contains properties related to the selected mesh.
3D View
The 3D View is having by default an Orbital camera that is centered to the Bed.
- Rotate around the bed: inside the 3D View, you perform a Left Click that you maintain while at the same time you move your mouse.
- Zoom In/Out: inside the 3D View, you use directly the scroll up/down on the mouse, alternatively you can use Ctrl + and Ctrl -.
- Panning: inside the 3D View, you perform a Middle Click while maintaining and you move accordingly with your mouse.
- Contextual Menu: inside the 3D View, you perform a Right Click that will popup the Contextual Menu. The same Contextual Menu is available at the Model Browser too.
Import Models
Now let us import an STL/OBJ file inside the Project. There are different ways to perform this action:
- Menu: Project/Import Models, through the following shortcut Ctrl I. We store also Import Recent Files inside the Project menu.
- Toolbar: the first icon is used to Import files.
- 3D View, Model Browser: perform a right click to raise the Contextual Menu and click on Import Models.
- Drag and Drop, you can simply drag and drop your STL/OBJ file from the file browser for instance inside the 3D View.
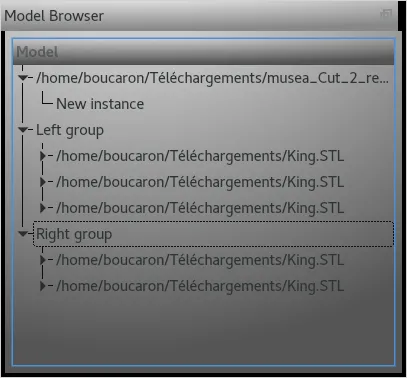
Model Browser
The Model Browser is detachable panel that holds a tree with all groups and models. It is helpful when you have many items on the heat bed to simplify the selection of several items.
You can perform the Selection/Deselection of items or groups and perform any operation that you can do already with the same Contextual Menu as found in the 3D View that is also available here through a Right Click.
The following operations are specific to the Model Browser:
- Edition/Group: it allows to create a group of models and groups. The multiple selection/deselection is performed with Ctrl Left Click either in the 3D View directly or in the tree of the Model Browser. When a model is inside a group the selection will be performed on the top level group.
- Edition/UnGroup: break the selected groups.
- Edition/Rename Group: rename the selected group. A dialog will pop-up where you can change the name.
Selection
The Selection is performed directly in the 3D View by putting the mouse point on a Model and performing a Double left click.
You can unselect simply by performing a Double left click on an area where there is no model.
Also you can use also the Model Browser to perform the Selection too.
For the Multi Selection, in the 3D View you hold the Ctrl and the Double left click, similarly it can be performed in the Model Browser.
You can always rotate, zoom and pan.
Translate
First Select one or several models/groups, then you have few options:
- Click on the Translate icon in the Toolbar.
- Right-click in the 3D View to show the Contextual Menu and click on Translate.
- Right-click in the Model Browser to show the Contextual Menu and click on Translate.
To translate you hold the Left button of your mouse and you move it on the XY plane. If you need to move on the Z axis you can use directly the buttons found in the Translation tab, or directly enter the value.
You can unselect and select while keeping the Translate mode, as it is done in the Selection mode.
You can also set directly the position directly inside the Translation tab at the Properties panel.
Alternatively, in the Translation tab, you can use Up, Down, Left and Right arrows from your keyboard to translate the object in the XY Plane, you can use Page Up and Page Down to move on the Z axis.
Once finished, to quit the Translate mode, you have to select another mode for instance Selection mode.
TIP:To align the model to touch the Bed, in the Contextual Menu go in Edition/Align and click on Z Zero.
You can always rotate, zoom and pan.
Rotate
First Select one or several models/groups, then you have few options:
- Click on the Rotate icon in the Toolbar.
- Right-click in the 3D View to show the Contextual Menu and click on Tools/Rotate.
- Right-click in the Model Browser to show the Contextual Menu and click on Tools/Rotate.

At each extremum of the cross, there is a Sphere. You can rotate on the given axis by performing a Left-click to select the Sphere, while you hold the button, you can move the mouse and it will perform the rotation. (Red is for X, Green is for Y and Blue is for Z).
The default rotation mode is set to local referenced: for instance, if you select the Z rotation, it will rotate around its own Z axis and not according to the printing surface. While if you hold Shift the rotation model is set to parent referenced, meaning for instance if you selected the Z axis it will rotate around the Z axis of the printing surface.
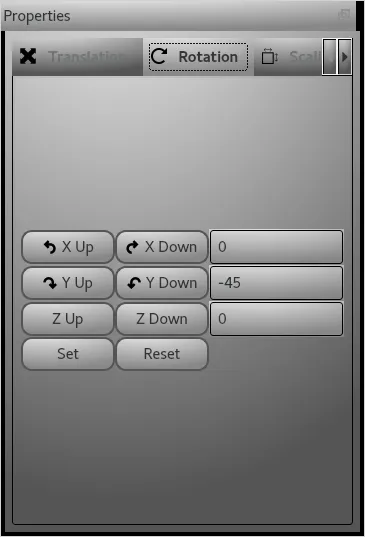
Alternatively, in the Rotation tab, you can use Up, Down, Left and Right arrows from your keyboard to rotate the object on X and Y, you can use Page Up and Page Down to rotate on the Z axis.
Once finished, to quit the Rotate mode, you have to select another mode for instance Selection mode.
TIP:In general the applied rotation will not touch the Bed, to align the model to touch the Bed, in the Contextual Menu go in Edition/Align and click on Z Zero.
You can always rotate, zoom and pan.
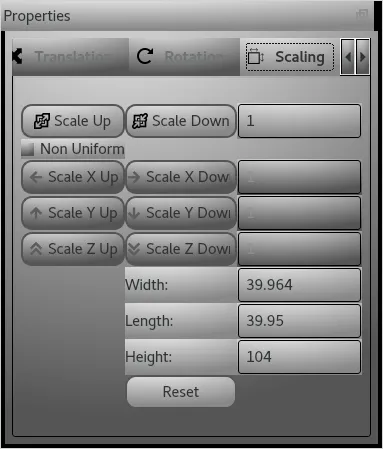
Scale
First Select one or several models/groups, then you have few options:
- Click on the Scale icon in the Toolbar.
- Right-click in the 3D View to show the Contextual Menu and click on Scale.
- Right-click in the Model Browser to show the Contextual Menu and click on Scale.
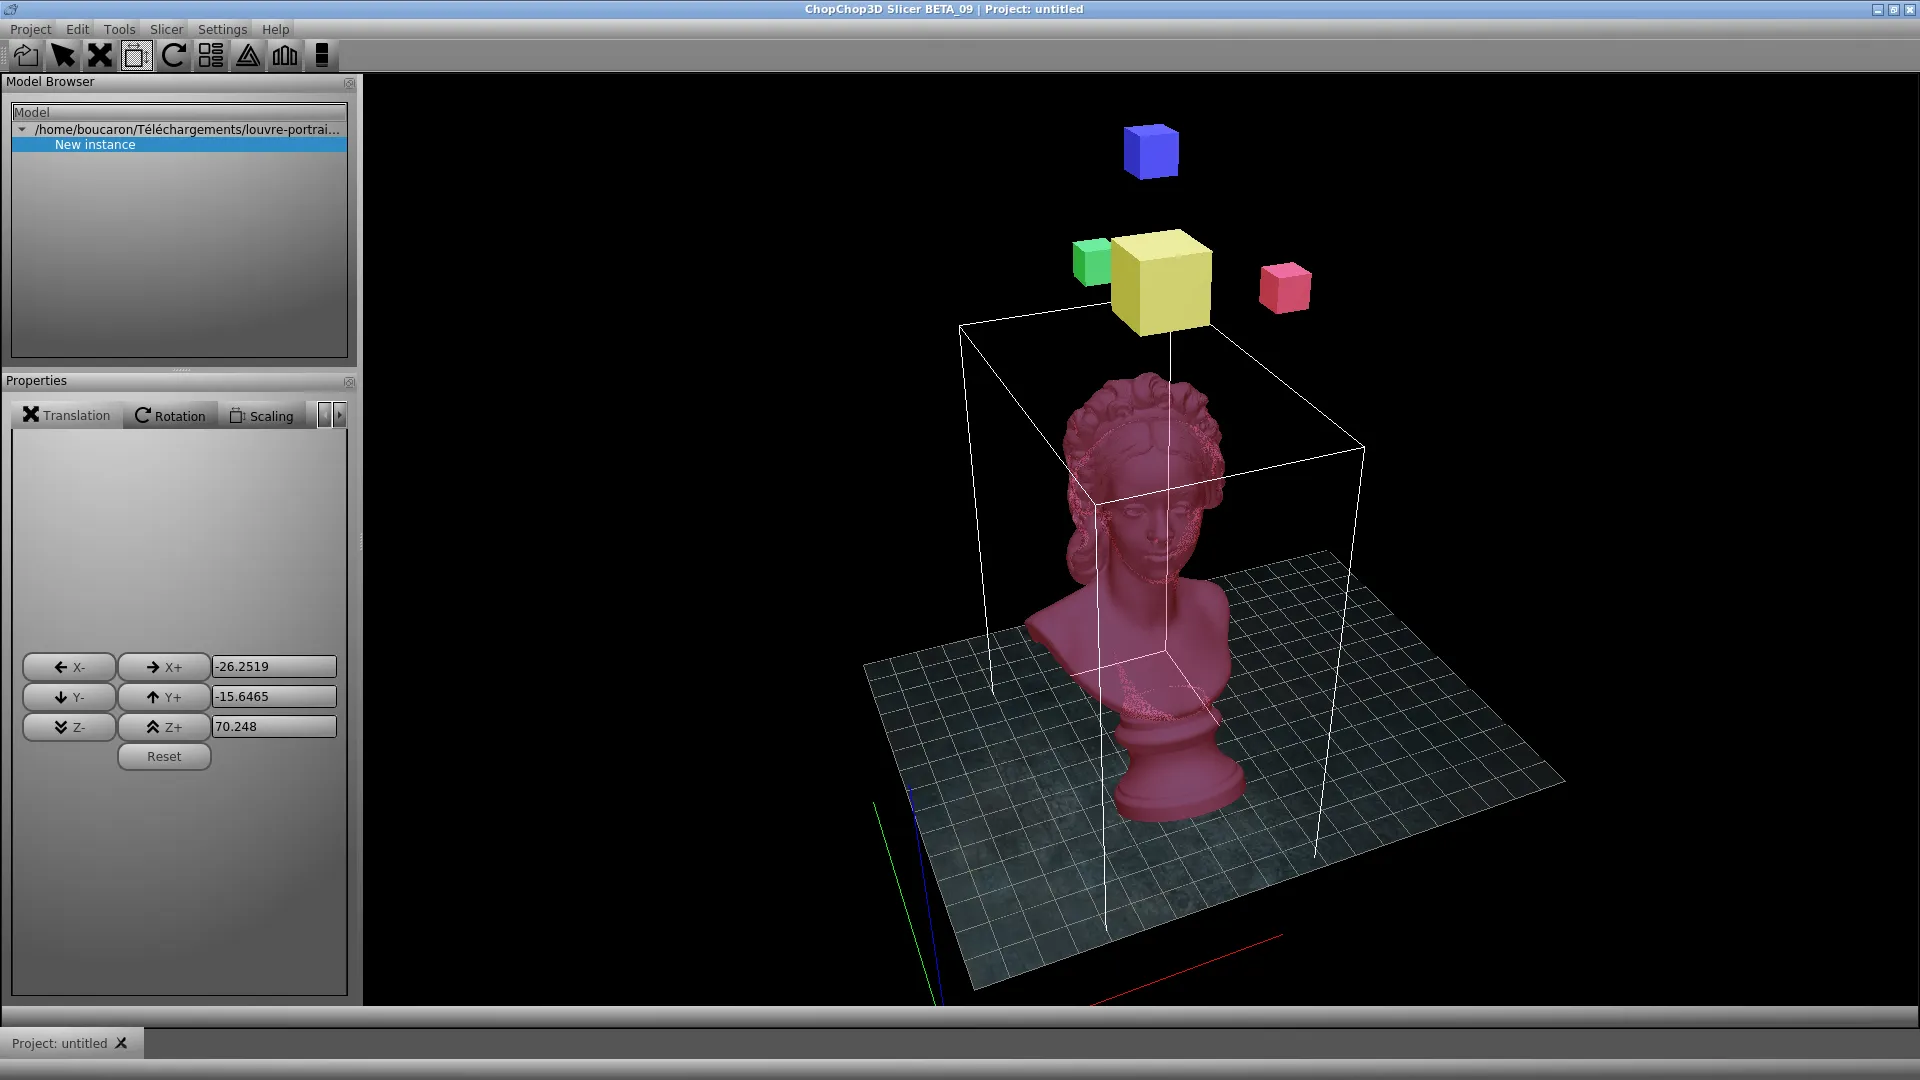
To scale uniformly, you select first the Yellow Cube with Left click, you hold the button and you move the mouse accordingly to increase or to reduce.
At each extremum of the cross, there is a Cube. You can scale non uniformly on the given axis by performing a Left-click to select the Cube, while you hold the button, you can move the mouse and it will perform the non uniform scaling. (Red is for X, Green is for Y and Blue is for Z).
You can also set directly the scale directly inside the Scaling tab at the Properties panel. Alternatively, in the Scaling tab, you can use + and - to scale up to scale down uniformly. Also, you can use Up, Down, Left and Right arrows from your keyboard to scale non uniformly the object on X and Y, you can use Page Up and Page Down to rotate on the Z axis.Once finished, to quit the Scale mode, you have to select another mode for instance Selection mode.
TIP:In general the applied scaling will not touch the Bed, to align the model to touch the Bed, in the Contextual Menu go in Edition/Align and click on Z Zero.
You can always rotate, zoom and pan.
Mirror
First Select one or several models/groups, then you go in the Properties panel and you pickup the Mirror tab.
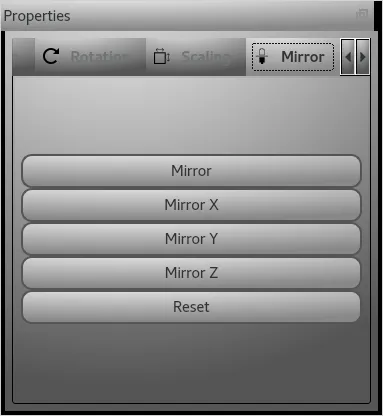
You just have to click on the appropriate button and in case of mistake you can perform a Reset.
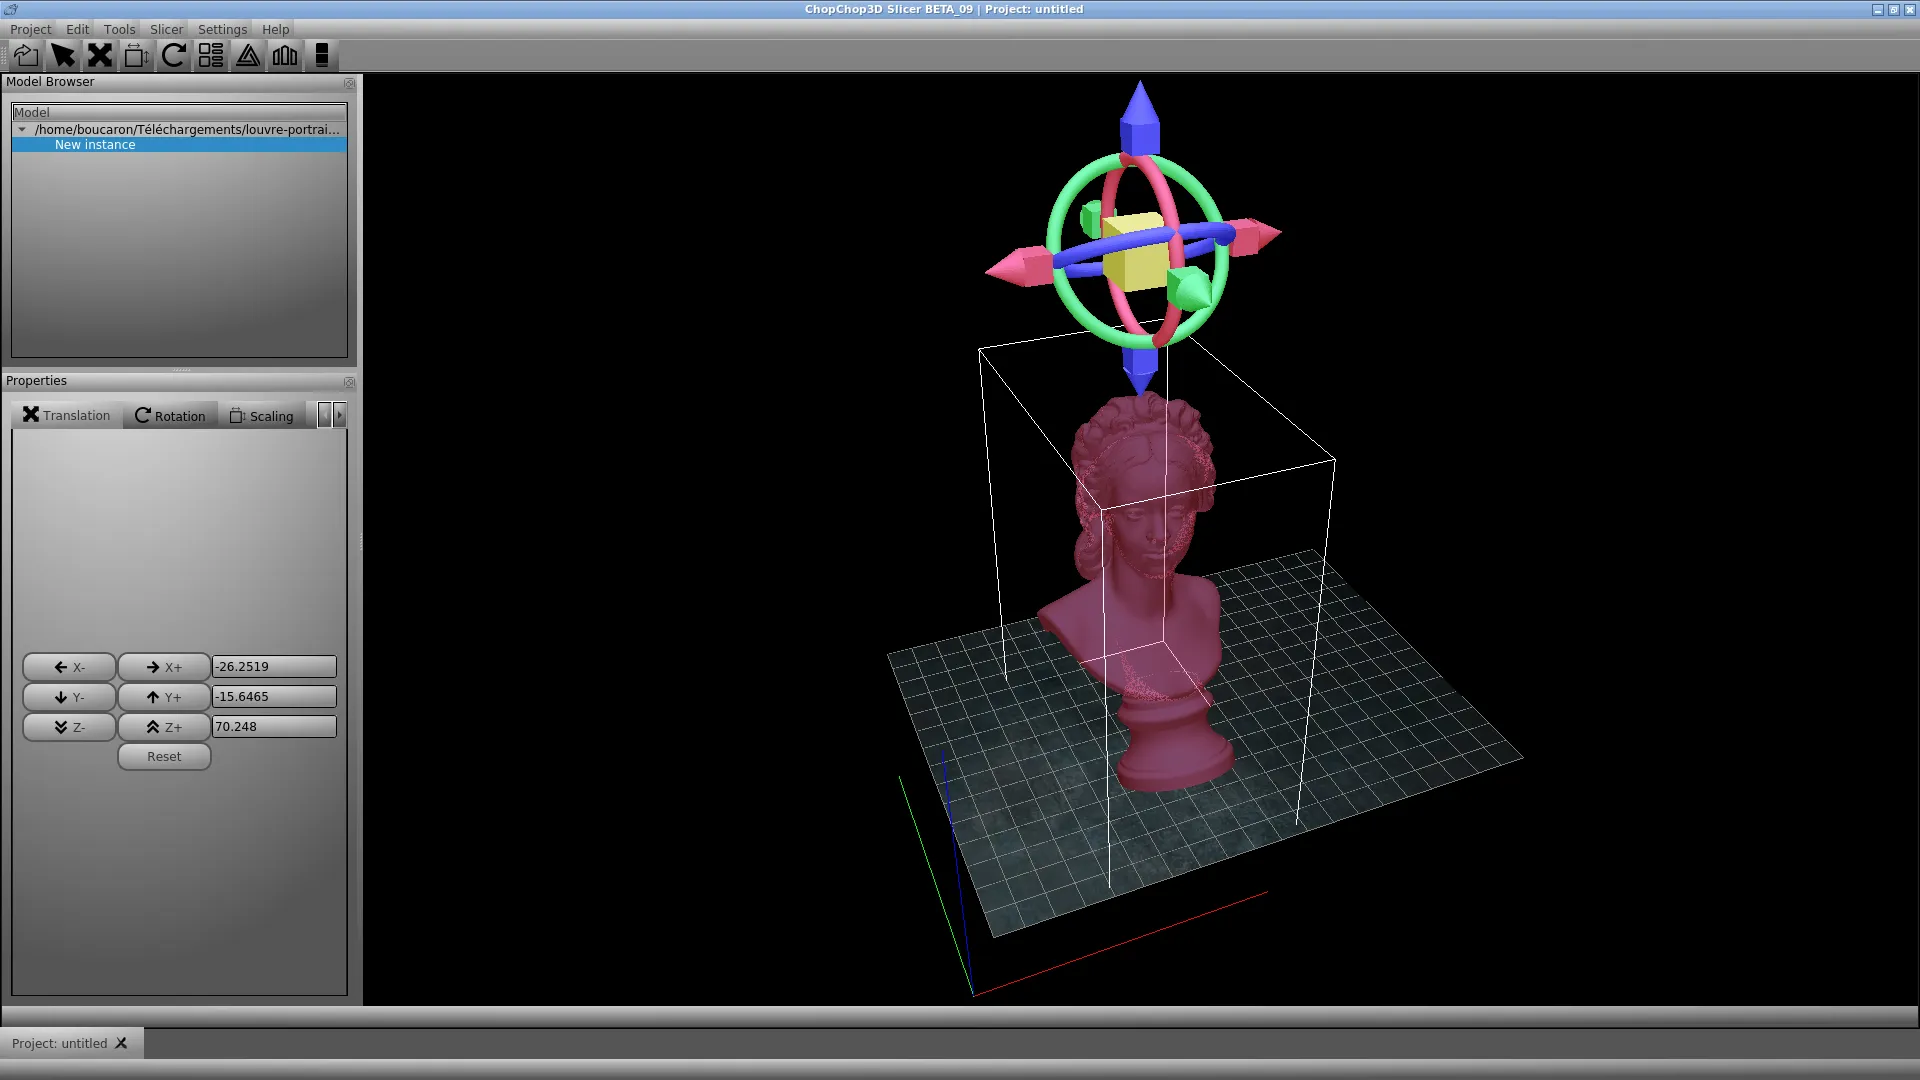
Gizmo
The Gizmo is an experimental feature that groups together the Translation, Rotation and Scaling together.
- Right-click in the 3D View to show the Contextual Menu and click on Tools/Show Gizmo.
- Right-click in the Model Browser to show the Contextual Menu and click on Tools/Show Gizmo.
To hide the Gizmo, you just have to click on Hide Gizmo in the previous Contextual Menu.
What it is ?
The Shape is the kind of the operation:
- Cube: it is used for Scaling, the big Yellow Cube is performing a uniform scaling, while other are used for non uniform scaling.
- Cone: it is used for Translating.
- Torus: it is used for Rotation.
- Red: X axis.
- Green: Y axis.
- Blue: Z axis.
How to use it ?
- First select a model with a Double Left click
- Select the Shape with a Left click and hold while moving the mouse. The colour of the selected shape will change to a flashy green when it is selected. You can move up/down and/or left/right. Once finished you release the button and you are ready to either select another model or to perform another operation.
Rotation modes ?
The default rotation mode is local referenced: your part is rotated in some way, if you select the Z rotation part, it will rotate on its own Z axis.
If you hold the Shift while performing the rotation, the rotation mode is parent reference: typically, it will rotate according to the selected axis based on the print platform.
The following video shows the difference based on a rotation on the Z axis, first local referenced then parent referenced.
Material
You can customize each model using a list of predefined materials.
- Select a model with a Double Left click.
- Click on the material you want.
Transparent material , you can use this material to check quickly if you have a hollowed model for instance. You can use the material Template/Red50 for this.
For instance, you will see that the famous Adalinda Dragon from Loubie is hollowed.
![]()
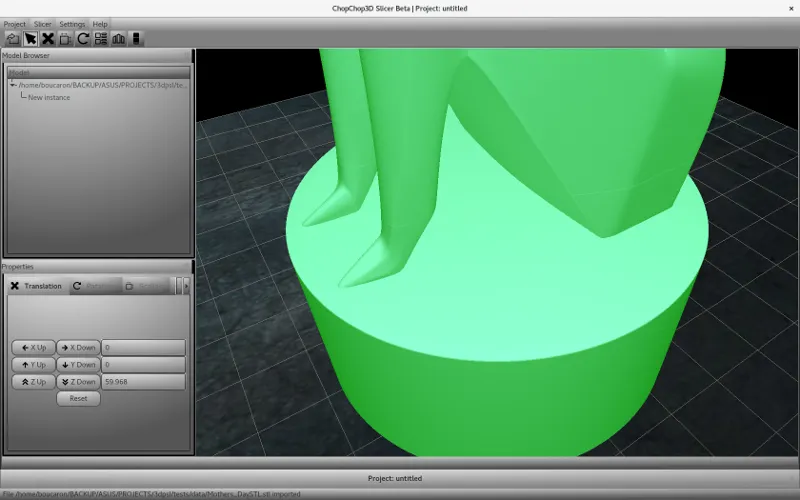
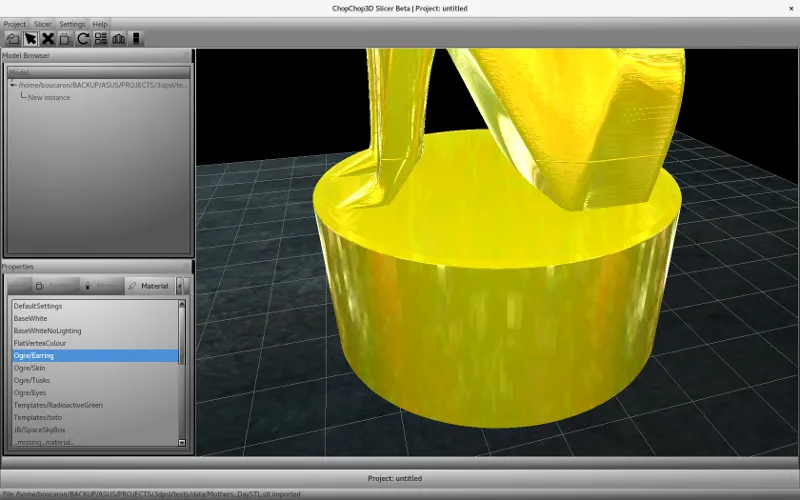
Highly Reflexive material, it is quiet useful to check the quality of the tessellation or to spot on defects on a model. You can use the material Ogre/Earring for this.
For instance, you will not see anything with the default material, but when choosing this one, you can see there are few surface defects on this model (it prints fine), or the pedestal is having a different height.
Duplicate
First you select at least a model.
- Right-click in the 3D View to show the Contextual Menu and click on Edition/Duplicate.
- Right-click in the Model Browser to show the Contextual Menu and click on Edition/Duplicate.
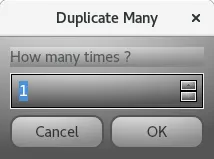
If you want to duplicate more you can use in the Contextual Menu, the following Edition/Duplicate Many that will pop-up the following dialog. You set the number of items and you click on Ok.
Group
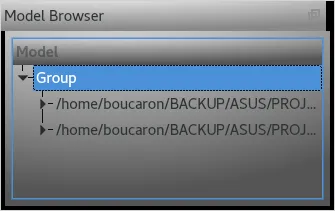
The Group feature in this context is used for operations such as Translation. First, you perform a Multi Selection holding Ctrl and performing Double left click. Once done:
- Right-click in the 3D View to show the Contextual Menu and click on Edition/Group.
- Right-click in the Model Browser to show the Contextual Menu and click on Edition/Group.
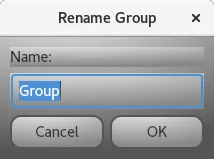
You can Rename the group, first you select it in the Model Browser, then through a Right-click you open the Contextual Menu and you click on Edition/Rename Group.
Similarly, you can UnGroup the group, you select the group you want to Ungroup in the Model Browser, then through the Contextual Menu and you click on Edition/UnGroup.
Align
Most of the time you need to align the model to touch the bed, to do so:
- Right-click in the 3D View to show the Contextual Menu and click on Edition/Align/Z Zero.
- Right-click in the Model Browser to show the Contextual Menu and click on Edition/Align/Z Zero.
- Right-click in the 3D View to show the Contextual Menu and click on Edition/Align/ and pick up the alignment you want to perform.
- Right-click in the Model Browser to show the Contextual Menu and click on Edition/Align/ and pickup the alignment you want to perform.
Show and Hide
Typically when you are editing supports you want to be able to hide models around to see all the details of the model, also from time to time you want to hide and show the model to check the supports too, to do so:
- Right-click in the 3D View to show the Contextual Menu and click on Edition/Show and Hide/ and pick up the alignment you want to perform.
- Right-click in the Model Browser to show the Contextual Menu and click on Edition/Show and Hide/ and pickup the alignment you want to perform.
- Hide Selection : that hides the Selection.
- Hide All : that hides all models/groups.
- Hide All Except Selection : that hides all models/groups except the Selection.
- Show All : that shows all models/groups.
- Show Selection : that show models/groups.
Open, Save, Import and Export
Open
Go in the Main Menu and click on Open, it will pop-up the Project Browser dialog as follows
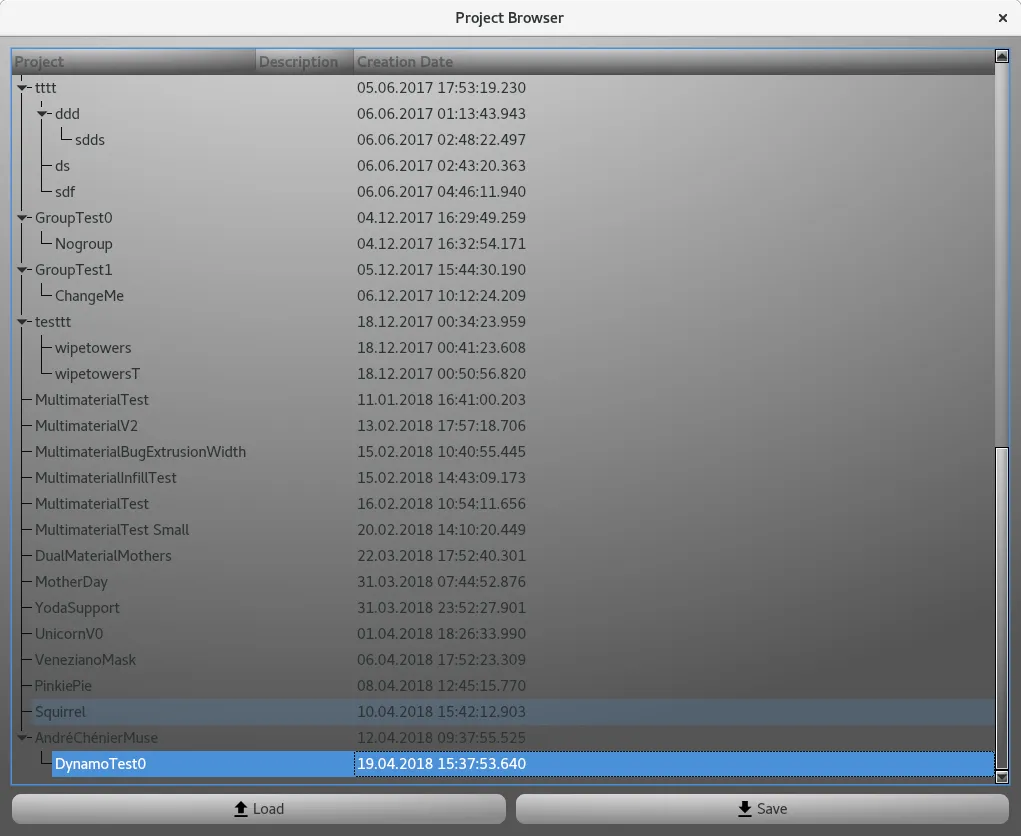
It shows a hierarchy of projects.
You can click on the Load button, that will create a new Project and open it.
Alternatively, you can open the Contextual Menu:
- You can click on Load that will perform the same previous action.
- You can click on Load inside the Current Viewer that will open the project and append the entities inside the Current Viewer.
Once the project is loaded, if there is any profile attached to the project, the following question will pop-up.
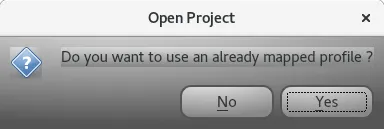
If you click on Yes, it will pop-up the dialog showing the mapped profiles, as detailed in the Show Profile section.
Save
Go in the Main Menu and click on Save, it will pop-up the Project Browser dialog as described in the Load case.
- If you want to save as a son of an existing project, first you select it with a Left click then, you click on the Save as button (You can use the contextual menu too).
- If you want to save as a top entry, you need first to perform a Right click to pop-up the Contextual menu and click on Deselect All, then you can save it.
Import
You can import a project from another database.
Go in the Main Menu and click on Import from DB, that will pop-up the File dialog to select the associated database.
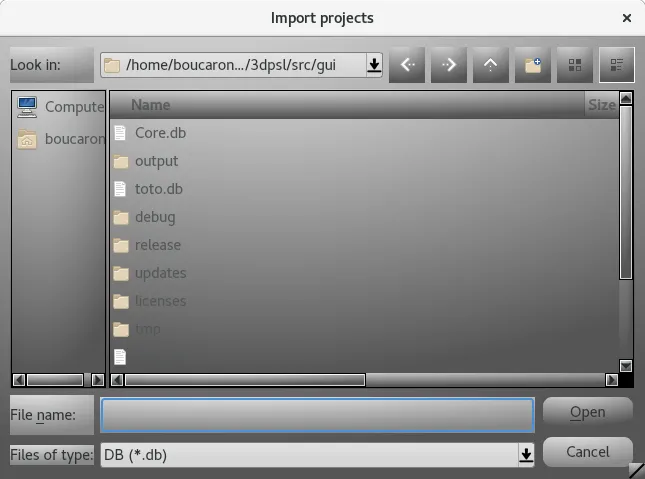
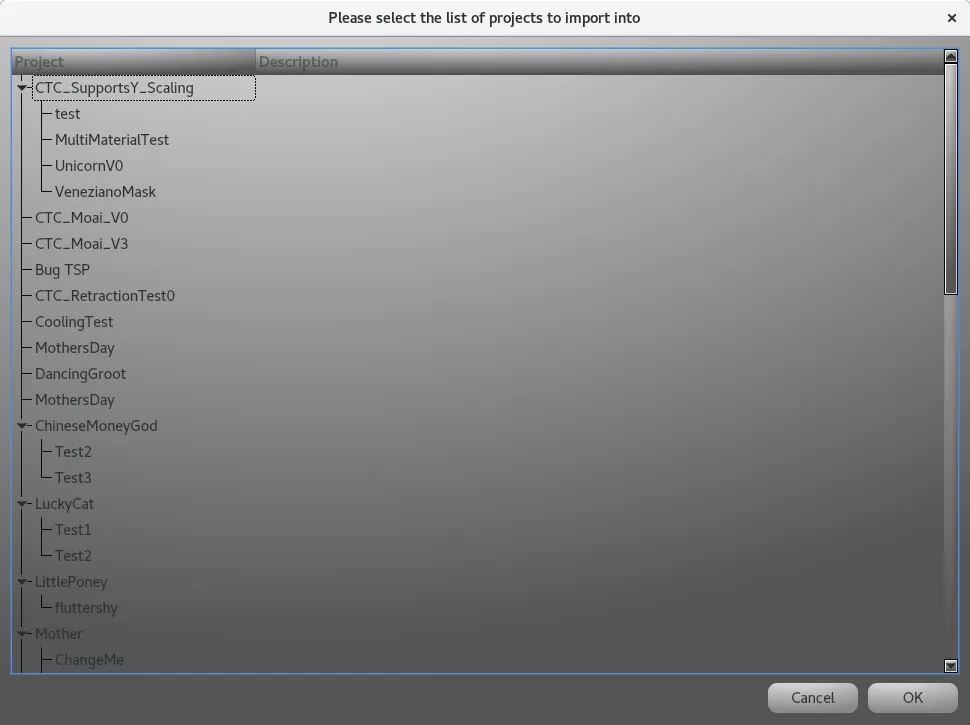
Then you select, the set of projects you are interested to import and you validate.
Export
You can export a project to another database.
Go in the Main Menu and click on Export to DB, that will pop-up the File dialog to select the associated database.
Delete
In the Model Browser perform a Right click to pop-up the Contextual menu and click on Delete that will pop-up the confirmation dialog.
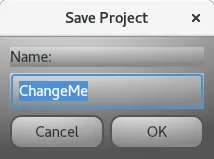
Rename
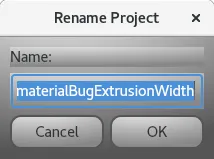
In the Model Browser perform a Right click to pop-up the Contextual menu and click on Rename that will pop-up the following dialog:
Edit Description
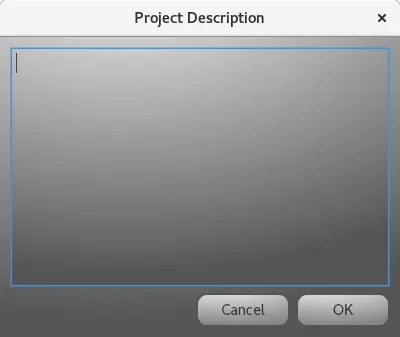
In the Model Browser perform a Right click to pop-up the Contextual menu and click on Edit Description that will pop-up the following dialog:
Show Profiles
This features shows the different kind of profiles attached to a given Project.
In the Model Browser perform a Right click to pop-up the Contextual menu and click on Show Profiles that will pop-up the following dialog:

You can perform the following actions for each kind of profile through the Contextual Menu available through a Right click:
- Open Profile in Read-Only Mode: open in read-only mode the selected mapped profile.
- Insert: insert a mapped profile, the profile dialog will pop-up, you can load a profile and then click on Insert or Cancel.
- Delete: delete the selected mapped profile from the given project, a confirmation dialog will pop-up and you can accept or reject it.
- Load Profile in Viewer : this case will be only shown if you open a project, it will load the profile in the current viewer and either the associated Quick Slice dialog or Slice Dialog will pop-up with the loaded profile ready to slice.
Backup
Setup projects and profiles is long and tedious, so it is mandatory to backup all your settings on a regular basis.
ChopChop3D Slicer uses a Database for storage, you can have several DB instances if needed.
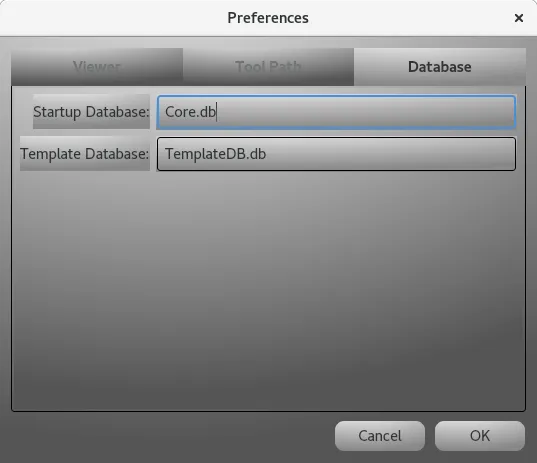
By default the slicer will look for the Startup Database Core.db and the empty database Template.db except if you have setup it differently in the Main Menu then Settings/Preferences and the tab Database
Camera
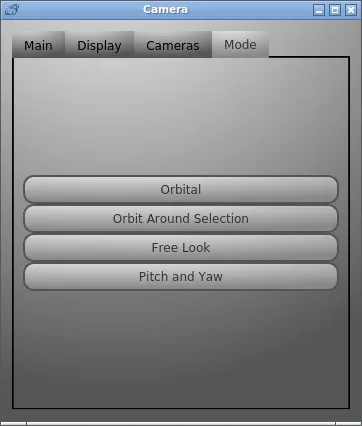
The settings of the Camera can be edited through the contextual menu that shows the Camera dialog as follow: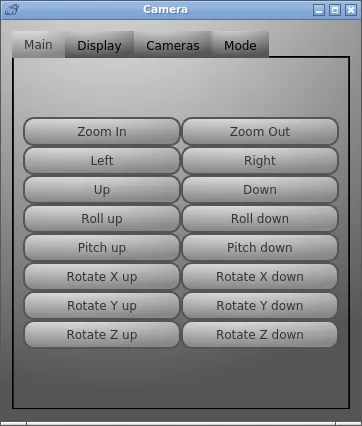
Main
This tab is used to perform common operations: Zoom In/Out, Move the camera (Left, Right, Up, Down), Roll, Pitch and Rotate.
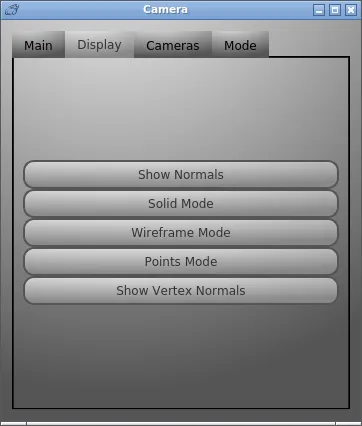
Display
This tab is to change the mode of the Display: Solid (by default), Wireframe or Points. It also can show additional features such as Face Normals and Vertex Normals
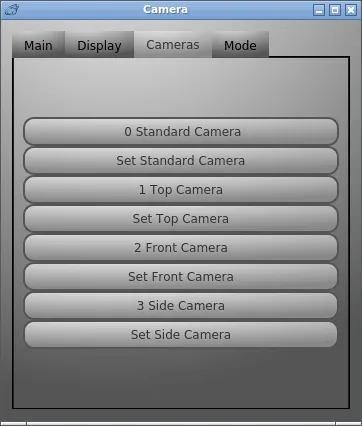
Cameras
This tab enables to switch from a camera to another one: Standard, Top, Front and Side camera. You can set the camera for each of them and switch quickly.
Mode
This is the travel mode of the camera: Orbital, Orbit Around Selection, Free Look, Pitch and Yaw. By default it is Orbital which is centered around the center of the bed. You can select a model and activate Orbit Around Selection (if there is not selection, then it orbits around the center of the bed). Finally there are Free Look and, the Pitch and Yaw mode that enables to move as you want the camera to see details around the model for instance during the edition of supports.
Presets
The sensitivity for the mouse for common operations such as Translation, Rotation, Scaling and associated buttons can be modified through the Viewer Presets. It is accessible through the contextual menu that will popup the Viewer Presets as follows: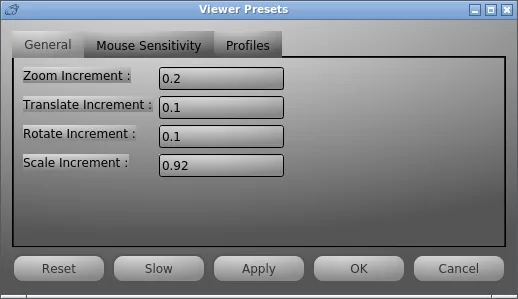
Basic rule is as follows the larger the value the more sensitive/faster/less precise it is.
There is a list of buttons:
- Reset which sets the default settings (everything set to 1), you need to click on Apply or OK to validate it.
- Slow which sets the default slow/precise settings, like the Reset you need to click on Apply or OK to validate it.
- Apply which applies the current setting and keep the dialog open for further tuning.
- OK which validates the current setting and close the dialog.
- Cancel do nothing and close the dialog.
General
This sets the increment for the following :
- Zoom sets the sensitiviy of the zoom for the mouse, the keyboard and also the buttons at the Camera dialog.
- Translate sets the increment of the translate buttons. By default, it moves by 10mm when it is set to 1.0, the slow default preset moves it my 1mm.
- Rotate sets the increment of the rotation buttons. By default, it is set to 10 degrees by click, the slow default presets is set to 1 degree by click.
- Scale sets the increment of the scale buttons. By default, it is set to 10% increase/decreaseby click.
Mouse Sensitivity
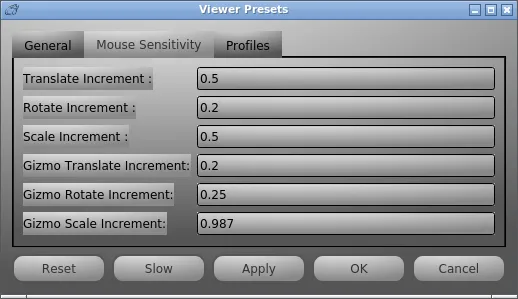
This tab is used to set the sensitivity of the mouse for the following operations during the mouse move:
- Translate tool.
- Rotate tool.
- Scale tool.
- Combined Gizmo with the Translate,Rotate and Scale tool.
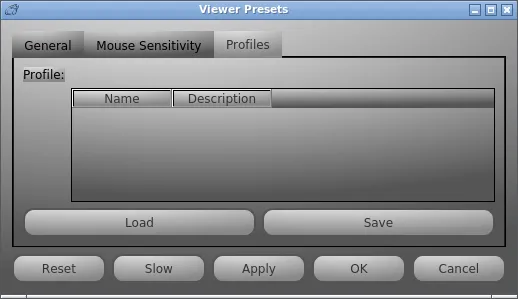
Profiles
This tab is used to load/save/delete custom presets.